 "StudyStudyStudy" (jesterjin)
04/26/2016 at 14:30 • Filed to: None
 4
4
 2
2|
"StudyStudyStudy" (jesterjin)
04/26/2016 at 14:30 • Filed to: None | 4
| 2 |
Sorry for the lack of video for those interested, first my gimbal broke, which I did find a fix for (the motor unplugged itself on a rotation), then updating the gopro prevented it from communicating with my computer.
Anyways, my friend wanted to borrow my welder (welding a new muffler and some other things on his car, I plan on being there so hopefully get some footage of another project, Turbo E30!), so I decided to tackle the immediate welding I needed to do.
To my disappointment, either my tank leaks or the seals aren’t good on the valve as I came back to a near empty tank. Reading was 0 on the tank gauge, but still had some pressure in the bottle and line to get me through.
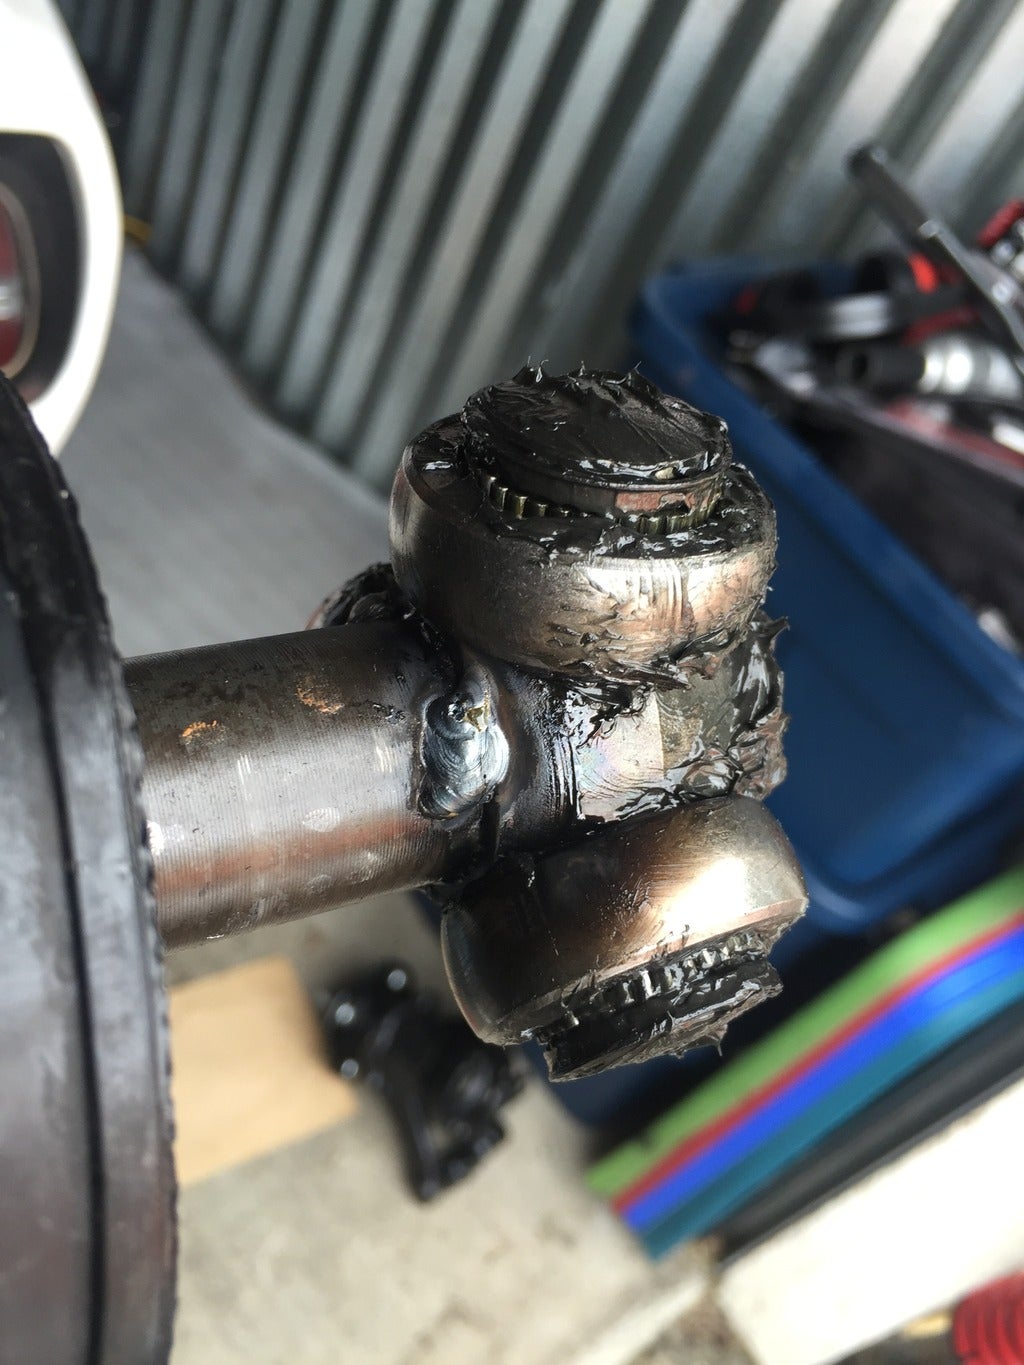
Managed to get three tacks onto the axle where I wanted it. Basically my Frankenstein axle has no hard stop on the inboard side as this side had a CV joint. The spider gear does stop as the splines run out, but I’ve heard bad things when you crash splined things into un-splined things. Three tacks should supply just enough stopping force if the worst were to happen and the axle bottomed out. If the spider gear goes wrong, that unfortunately does means a replacement axle, but I can live with this for a while. Next axle will most likely be a custom unit assuming this differential works in the long run.
Interestingly enough, the passenger side which I measured at being real tight with about 0.2 inches of room was comfortably setup with quite a bit of room to spare, while the driver side which should have had a lot more room ended up needing at least a 1/2 inch of extra space via the control arms extended to fit the axle. I think I may take that apart and recheck if it is just getting hard to compress or actually binding. That is quite worrisome and the last thing I want is to jam an axle into the frankenstein rear differential.
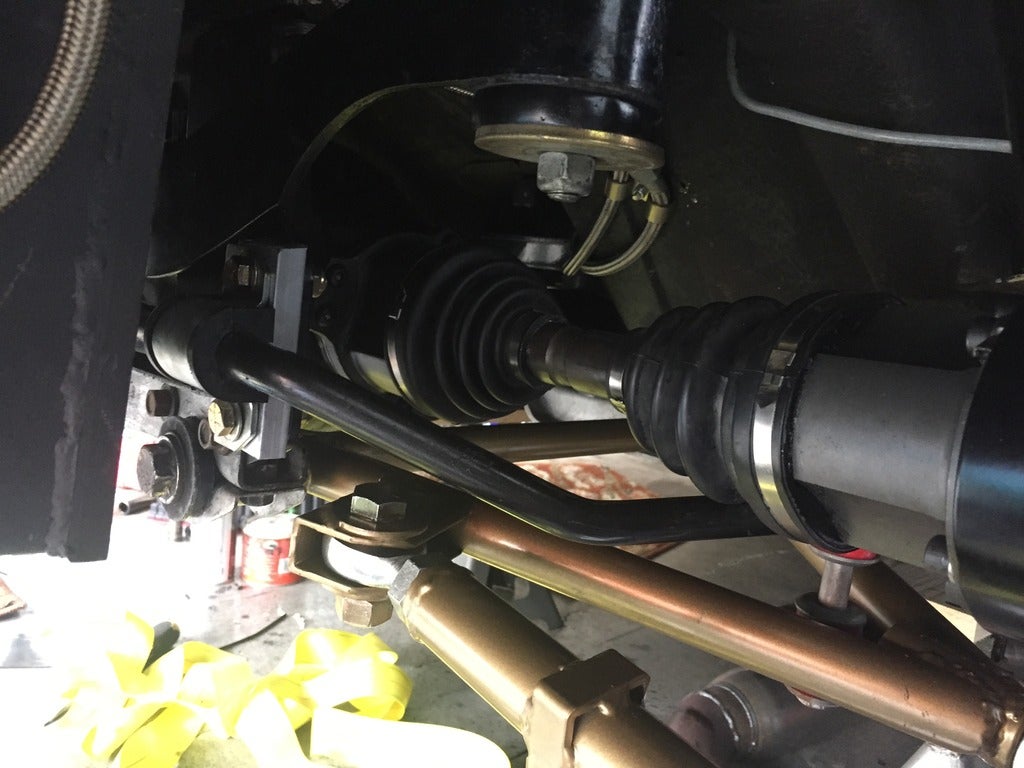
With the axle reassembled and the boots tightened, the axle was installed. Control arm needed to be extended 10 out of the 20 turns the rod end can turn to fit the driver side with a bit of slack. Passenger side I think may have actually been fine with the factory length. 12 bolts needed for the passenger side, only 6 for the driver side, a ball headed allen socket was really the only way to tighten the spider gear housings as the angles were just too difficult otherwise. The pathfinder axle didn’t have room nor did it come with a spring on the spider gear so I’m not sure how that will play into things (you can see that the inboard boot is much more compressed as the outboard joint spring is pushing in on the axle). I may have to build another axle as a spare and with double springs.
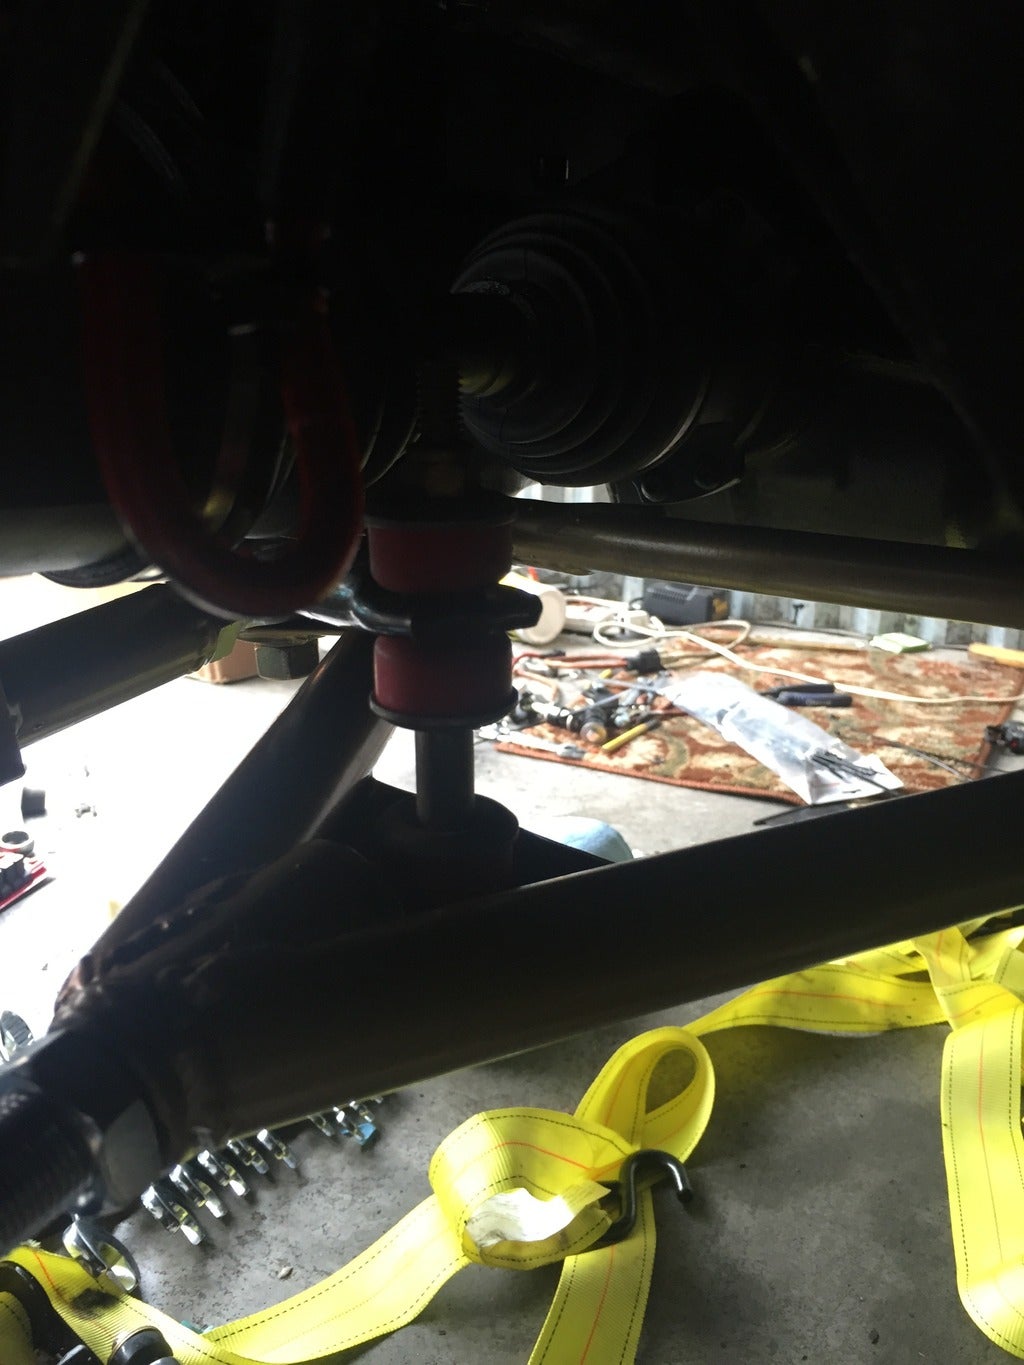
There was some concern about what to do about the end links. The adjustable ones I got were not cooperating and I really didn’t want to use them. Turns out by moving both sway bar bushing mounts to the bottom there was adequate space to reuse the ST sway bar bushings. Lined up perfectly as well so quite exciting. I’ll have to take measurements and revisit. I’ve heard adjustable end links are required to properly corner balance the car.
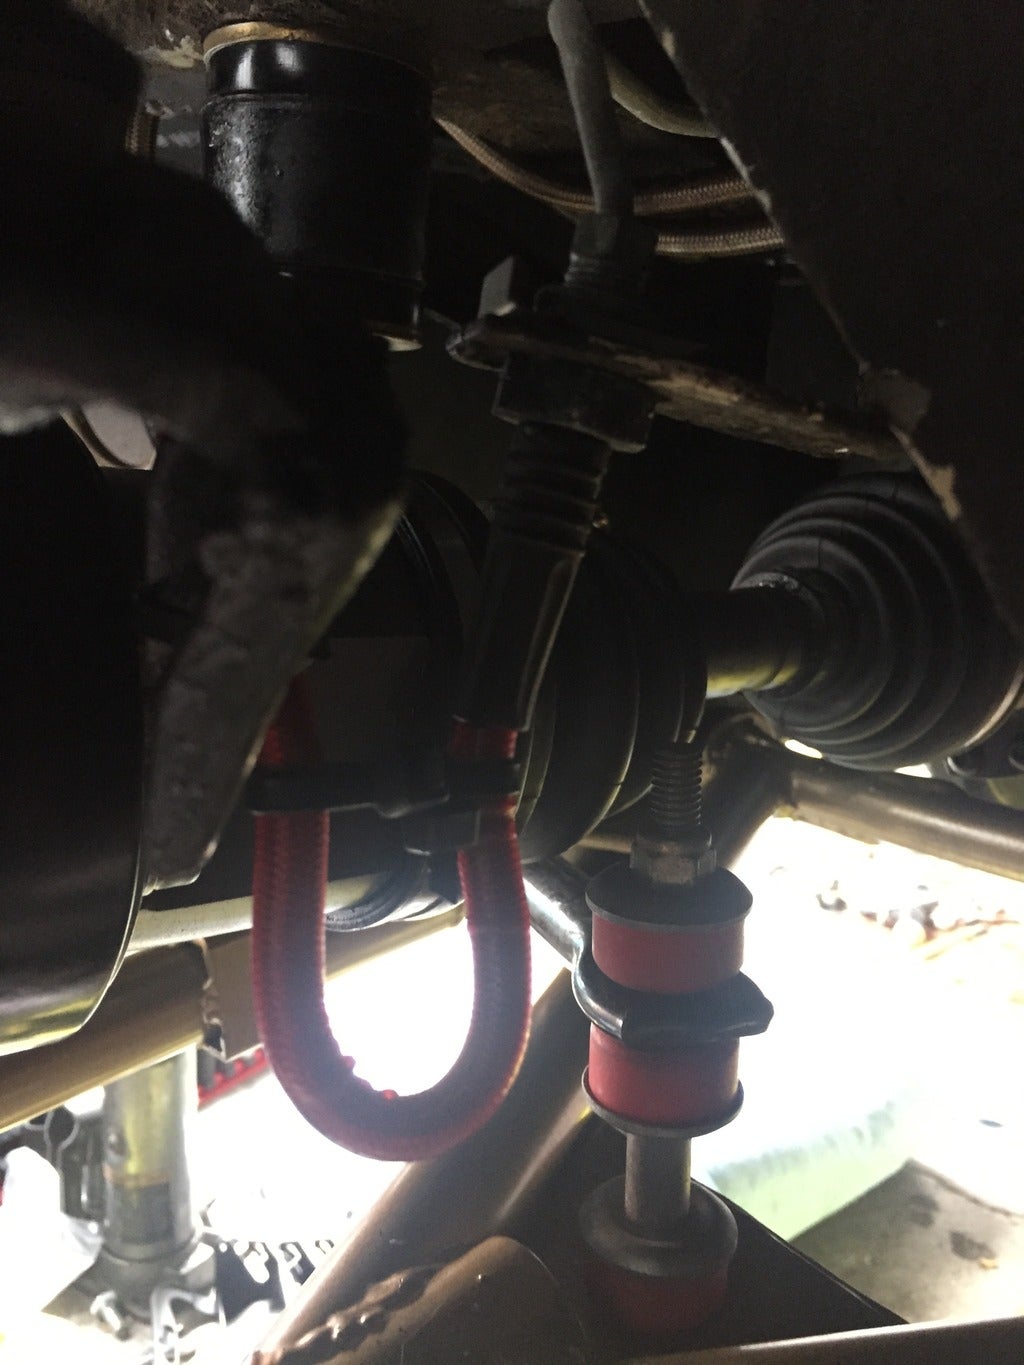
The brake line wasn’t damaged as I had feared, just the dust cover had been split open from rubbing on the half shaft. The reason it rubbed on the half shaft was that with the suspension droop any time the car was lifted it would pull at the brake line and disorient it. Being an aftermarket rear disc brake kit, the routing is real important. Hopefully with coilovers this shouldn’t be a problem for a while. The permanent fix would be to reroute the lines more inboard and remove the factory mount, but that will have to wait until I can find my brake fittings and parts box to make new lines. I had ordered new lines so I put them in just to be safe. Added zip ties to secure the routing (note to self, make sure to secure hard line before dropping the car).
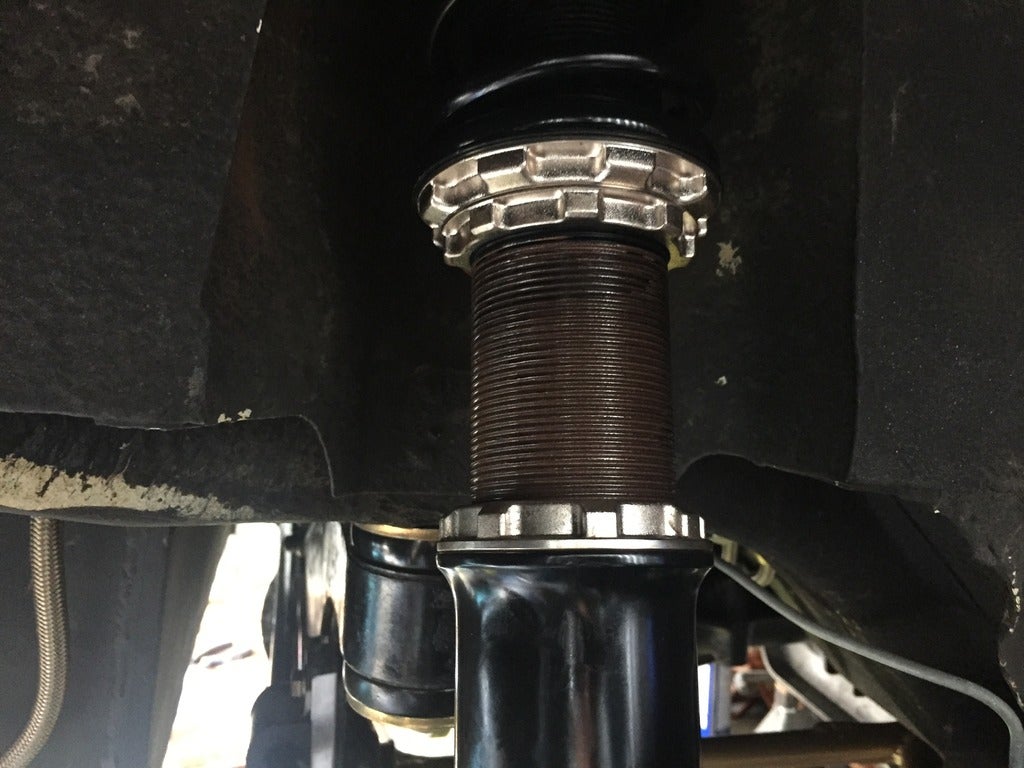
Both sides had the uprights installed. These are the coilover threads remaining. I threaded the upright about half way in as a starting point. Right now the hub is a little below the body line. In theory it should drop about 2 inches. That should bring it just above the bodyline so very similar to the blue car a couple posts ago. Still have an additional 2.75 inches of height adjustment left. Pretty happy with them so far.
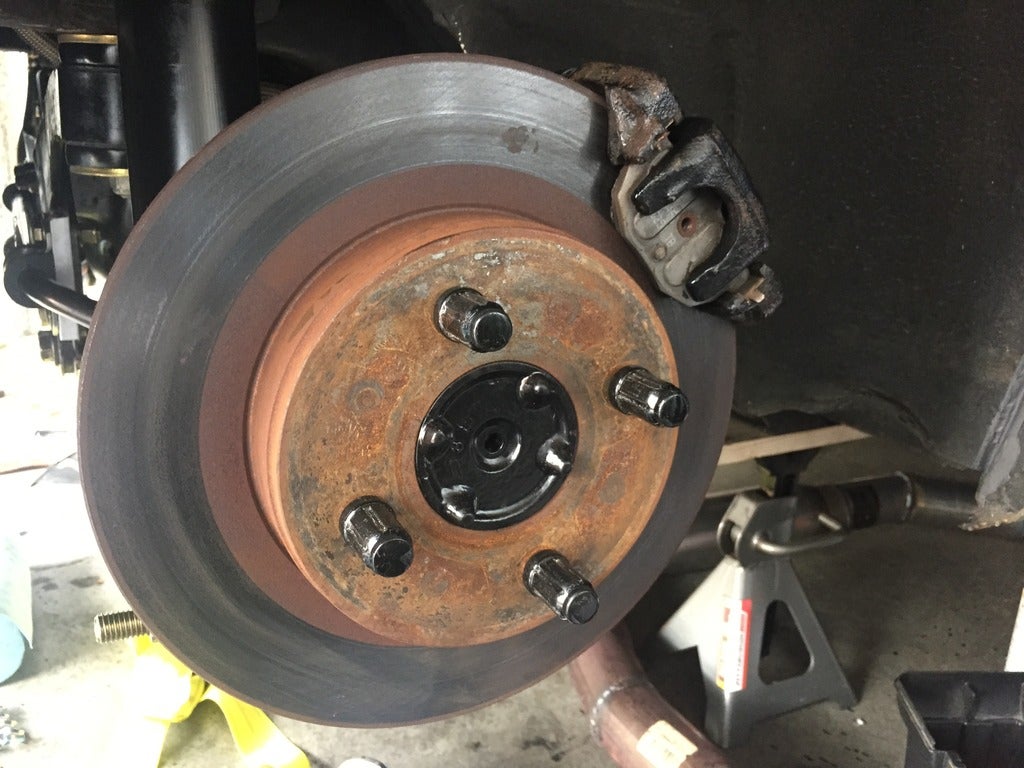
The brakes back together. Turned the pistons back in to start from 0. Unfortunately given how my exhaust runs quite a bit of moisture ends up on the passenger wheel well. Everything on this side was much more rusty. I’m not sure how to combat it. Will have to sit and think for a while. Right now it sits just before the pinch weld allowing the weld to be used as a jacking point. I could reinforce a bit ahead of the pinch weld and cut that portion out and have the exhaust stick straight out the side, granted as it is now it is a bit more discrete.
Bled the brakes very thoroughly.
Went under the car to install the drive shaft and the exhaust. I really need to have the exhaust guys look at it again and maybe add another V band and mount down stream. Not the hardest thing to put back together by yourself, but definitely could be easier.
I figured since I bought the parts I might as well take a look at replacing the oil drain plug. To my chagrin the pesky leak is still there even with my replacement. Good news is that I think I have found the culprit, looks to be right around the drain plug. Reading on the internet there seems to be 4 possible problems:
1. debris trapped under gasket not allowing a good seal
2. crack near the drain plug on the oil pan
3. bad gasket, toyota used a felt/composite type gasket with silicone.
4. stripped out plug
The new plug threaded in fine and the old one didn’t pull out any threads I saw so it probably isn’t 4. I wanted to save the oil so it was a quick swap, so not much time to actually check for a crack or the threads. The oil seems to bead around and then drip right from the oil pan plug gasket. I timed it at about 20 minutes for a drop, so it isn’t the worst thing, but I’ll have to drain the oil and take a real good look at the oil pan soon. Pretty happy it isn’t the oil pan gasket, that could have been quite a nightmare.
I went to go start the car and thought I should check the oil. Good thing I did, it was reading just at the very tip of the dip stick. Combined with my remote oil filter that could have sucked the oil pan dry. I added a quart and hit the full mark on the dipstick. Sounds about right, a drop every 20 minutes, a couple months being parked. To my surprise the engine coughed into life without even a jump pack. I hadn’t driven it in a couple months, but that alternator I think is to really credit.
With the wheels on it was real easy to see both wheels turning in the same direction. Don’t worry I didn’t put it into gear, but this driveline is known to turn the drive shaft in neutral. You can stop it with your hands. Good preliminary sign that the LSD is working.
With the wheels on it was also easy to see I definitely need to just my toe. Frankly I need to adjust my whole suspension. There is a pretty highly recommended shop nearby, so I’ll give them a ring. I have life time alignment with firestone, but I highly doubt they are going to do much if at all for my car given all the adjustablilty involved.
Car pictures hopefully next round!
Lessons learned:
Sometimes someone else’s need is a good enough reason to get your but in gear.
Sitting on concrete for 8 hours leaves your tailbone real sore the next day, even if you have some padding between.
Having friends stop by and lend a hand is awesome, I’ve been working on this for so long by myself it was just nice to have someone there to talk to and shoot the breeze and grab me a tool or hand me a paper towel. Never take that for granted.
There is a strange feeling of glee when you start coming up to an end of a small project.
Money spent:
14 - oil cap
7 - magnetic drain plug
8 - synthetic oil
Subtotal: 29
Total spent: 21892
!!! UNKNOWN CONTENT TYPE !!!
 Manwich - now Keto-Friendly
> StudyStudyStudy
Manwich - now Keto-Friendly
> StudyStudyStudy
04/26/2016 at 14:53 |
|
“Unfortunately given how my exhaust runs quite a bit of moisture ends up on the passenger wheel well.”
Longer exhaust tip aimed more down might be a fix for that, perhaps?
Glad to see how this has all come together.
|
StudyStudyStudy
> Manwich - now Keto-Friendly
04/26/2016 at 14:59 |
|
Something along those lines, right now it is pointed down with a turn down of sorts inboard of the rear pinch weld. Either I need to get it out from under the car so that it is projected further out, or I need to route it behind the wheel well.
Thanks for the suggestion, and I too am very happy it is finally getting road worthy!